
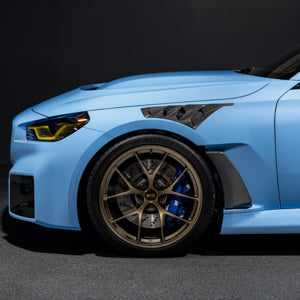

Replacing the factory amber front reflectors is one of the most effective exterior upgrades for the BMW X3 and X3 M. This DIY guide explains how to install the IND Painted Front Reflector Set on the BMW G01 X3 and F97 X3 M, with the same general installation process applying to the BMW G02 X4 and F98 X4 M.
Each IND painted reflector is finished in-house using factory BMW paint, then polished and quality inspected before shipment. The body-color replacement removes the visual interruption created by the factory amber reflector while maintaining a clean, factory-style fit.
This installation requires removal of the plastic wheel-well rivets and partial release of the painted wheel arch extension to access the rear of the reflector. The wheel and complete wheel-well liner do not need to be removed.

Vehicle Applications
Installation Video
Estimated Installation Time
Approximately 30 to 45 minutes.
Installation Difficulty
2 out of 5.
Required Tools and Supplies
- Plastic rivet removal tool
- Plastic trim removal tool
- Plastic panel wedge
- Replacement plastic rivets, if required
- Isopropyl alcohol or automotive-safe surface cleaner
- Clean microfiber towel
- Nitrile gloves
Before You Begin
- Park the vehicle on a level surface and allow the body panels to reach room temperature.
- Clean the front bumper and wheel arch area before beginning.
- Turn the steering wheel fully away from the side being serviced to increase working clearance.
- Complete one side before beginning the opposite side.
- Use plastic tools around painted surfaces whenever possible.
Step 1: Remove the Plastic Wheel-Well Rivets
Locate the plastic rivets securing the forward section of the painted wheel arch extension inside the front wheel well.
Use a plastic rivet removal tool to carefully remove the required rivets. Support the surrounding trim while removing each fastener to reduce stress on the wheel arch extension.
Set undamaged rivets aside for reinstallation. Replace any rivets that become distorted or damaged during removal.


Step 2: Release the Wheel Arch Extension
After the plastic rivets have been removed, begin releasing the clips that secure the front section of the painted wheel arch extension to the bumper.
Use a plastic trim tool and work carefully along the outer edge. Release one clip at a time rather than pulling the entire extension outward at once.
Do not completely remove the wheel arch extension. Only the forward section needs to be released to access the rear of the reflector.

Step 3: Pull the Wheel Arch Extension Away from the Bumper
Gently pull the released section of the wheel arch extension outward to create working clearance behind the bumper.
Avoid sharply bending or twisting the painted trim. Only a small amount of separation is needed to reach the factory reflector.


Step 4: Remove the Factory Amber Reflector
Reach behind the bumper and locate the rear of the factory amber reflector.
Apply controlled pressure from behind while supporting the reflector from the outside. Work gradually from one end to the other until the reflector releases from the bumper opening.
Do not pry against the visible painted bumper surface with a metal tool.


Step 5: Remove Remaining Adhesive
Inspect the reflector opening and remove any remaining adhesive or foam tape from the bumper.
Use your fingers or a plastic trim tool to lift larger adhesive sections. Follow with isopropyl alcohol or an automotive-safe surface cleaner applied to a clean microfiber towel.
The mounting surface must be clean, smooth, and completely dry before the painted reflector is installed.

Step 6: Test Fit the IND Painted Reflector
Before removing the adhesive liner, place the IND painted reflector into the bumper opening.
Confirm the following:
- The correct driver-side or passenger-side reflector is being installed
- The reflector is correctly oriented
- The perimeter gaps are even
- The reflector sits flush with the surrounding bumper
Remove the reflector after confirming fitment.
Step 7: Prepare the Painted Reflector
Clean the bumper mounting surface one final time and allow it to dry.
Remove the protective liner from the pre-applied adhesive on the rear of the IND painted reflector. Avoid touching the exposed adhesive with your fingers.

Step 8: Install the IND Painted Reflector
Carefully align the painted reflector with the bumper opening.
Once the reflector is properly positioned, press it firmly into place. Apply even pressure along the upper edge, lower edge, center, and both ends for approximately 30 seconds.
Confirm that the reflector remains flush and has not shifted during installation.


Step 9: Reinstall the Wheel Arch Extension
Return the wheel arch extension to its original position against the bumper.
Align each retaining clip with its corresponding mounting point. Press along the outer edge until every clip is fully engaged.
Inspect the panel gap and confirm that the painted wheel arch extension sits evenly against the bumper.

Step 10: Reinstall the Plastic Rivets
Align the wheel arch extension and wheel-well mounting holes.
Reinstall the original plastic rivets if they remain undamaged, or install replacement rivets where required.
Confirm that each rivet is fully seated and that the forward section of the wheel arch extension is secure.


Step 11: Repeat the Installation on the Opposite Side
Turn the steering wheel in the opposite direction and repeat the same procedure for the second front reflector.
Keep the driver-side and passenger-side reflectors separated during installation to prevent accidental side-to-side reversal.
Step 12: Final Inspection
Inspect both sides of the vehicle and confirm:
- Both painted reflectors sit flush with the bumper
- Perimeter gaps are even
- All wheel arch extension clips are fully engaged
- All plastic rivets are installed and secure
- No adhesive residue or fingerprints remain on the painted surfaces
Avoid washing the vehicle or directing high-pressure water at the reflectors for at least 24 hours after installation.

Installation Notes
- The wheel does not need to be removed for this installation.
- The complete wheel-well liner does not need to be removed.
- Only the forward section of the painted wheel arch extension needs to be released.
- Professional installation is recommended for customers who are unfamiliar with exterior trim removal.
- Verify all applicable local, state, and federal regulations before installing painted reflector replacements, as reflector requirements vary by jurisdiction.
Complete the Front-End Upgrade
The IND BMW X3 and X3 M Painted Front Reflector Set replaces the factory amber reflectors with body-color painted replacements developed for the BMW G01 X3, F97 X3 M, G02 X4, and F98 X4 M.
Explore additional parts for the BMW G01 X3, BMW F97 X3 M, BMW G02 X4, and BMW F98 X4 M.


