


Eventuri E46 M3 Carbon Plenum and Intake Installation: Complete DIY Guide
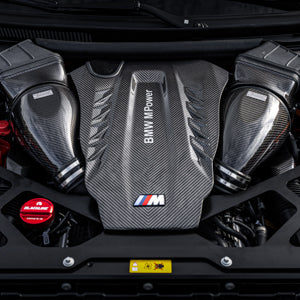
Upgrading your BMW E46 M3 with the Eventuri Hybrid Carbon Airbox System is one of the most effective performance and aesthetic improvements you can make to the legendary S54 engine. This complete DIY installation guide walks you through every step of removing the factory airbox and plenum, then installing the Eventuri carbon fiber intake system for maximum airflow, improved throttle response, and a stunning engine bay appearance.
Whether you have a manual or SMG-equipped E46 M3, this comprehensive walkthrough covers every part of the installation process, including SMG fluid reservoir relocation, breather hose updates for later production build dates, and carbon scoop installation into the brake duct.
Tools Required for Eventuri E46 M3 Intake Installation
Before starting your Eventuri carbon airbox install, gather the following tools:
- 10mm socket
- 13mm socket
- 15mm socket or wrench
- T25 Torx
- T30 Torx
- Clamp tool, pick, or flathead screwdriver
- Utility knife
- Trim tool or small flathead screwdriver
Removal Procedure: Factory E46 M3 Airbox and Plenum
Remove the Strut Brace
Begin by removing the four 13mm nuts that secure the strut brace. Lift the strut brace out of the engine bay and set it aside in a safe location.

Remove the Rear Pollen Filter Cover
Release the three retaining clips on the rear pollen filter cover by turning each clip a quarter turn to unlock it. Once unlocked, remove the cover and then remove the pollen filter from the housing.

Remove the Pollen Filter Housing
Remove the four T30 Torx screws that secure the pollen filter housing. Unclip the wiring harness from the front of the housing, then lift the pollen filter housing out of the vehicle.

Remove the Intake Duct Inlet
Remove the four push-pin retainers by lifting the center tab from each retainer body. With the retainers released, remove the intake duct inlet from the housing.

Remove the Headlamp Module Cover and Module
Unplug the headlamp connectors, then remove the plastic headlamp module cover, which is retained by clips on the sides. Next, remove the two 10mm bolts securing the headlamp module and carefully lay the module out of the way, taking care not to stress the wiring.

Disconnect the MAF Sensor
Unplug the MAF sensor by squeezing the tabs on the sides of the connector and pulling the connector free.

Remove the Factory Airbox and Intake Elbow
Loosen the hose clamps on both sides of the factory intake elbow. Once the clamps are loose, remove the airbox and intake elbow from the plenum.

Remove the Breather Pipe from the Plenum and Create Clearance
Remove the vacuum pipe from the plenum by squeezing the release tabs together and pulling the pipe free. Remove the 10mm nut from the transmission dipstick bracket, then pivot the transmission dipstick away from the stud.
To create additional clearance for plenum removal, lift the rubber trim and move the breather pipe out of the slot.

Release the Solenoid from the Airbox Mount
Locate the solenoid attached to the airbox with a rubber hanger. Slide the rubber hanger off the mount to release the solenoid from the plenum and airbox area.

Disconnect the Front Underside Breather and Remove Lower Mounting Nuts
Underneath the plenum, you will find two breather connections and two mounting points. Locate the first breather hose and mounting point toward the front of the plenum, then unclip the breather hose by squeezing the sides of the connector and pulling it free. Remove both 10mm mounting nuts from underneath the plenum. The second 10mm nut is located behind the solenoid that was released in the previous step.

Move the Rear Hoses Out of the Way
Lift the two hoses from their retainers at the rear of the plenum, then slide the hoses on top of the harness to create clearance for plenum removal.
Release the Driver-Side Harness Retainer
Remove the harness retainer on the driver side of the plenum by lifting the retainer upward to release it.

Remove the Top Breather from the Plenum
Remove the breather hose from the top of the plenum, then pivot the hose toward the valve cover side and out of the way.

Remove the Throttle Body Hose Clamps
Remove the hose clamps from the throttle bodies using a clamp tool, pick, or screwdriver. These clamps will not be reused, so damage to the original clamps is not a concern.

Separate the Plenum from the Throttle Bodies
Begin separating the plenum from the throttle bodies by tilting the plenum upward. This will provide access to the final breather hose underneath the plenum. In many cases, this hose may disconnect on its own as the plenum is lifted, but confirm that it is fully disconnected before removing the plenum.

Remove the Factory Plenum
Once all hoses, clamps, connectors, and mounting points are loose, remove the factory plenum from the vehicle.

Installation Procedure: Eventuri Hybrid Carbon Airbox and Plenum
Install the New Silicone Throttle Body Couplers and Position the Clamps
Install the new silicone hoses onto the throttle bodies and secure the throttle body side of each coupler. Make sure there is proper clearance around the throttle linkage. If the clamp interferes with throttle linkage movement, a check engine light or drivability issue may occur.
Slide the second clamp onto each silicone coupler. Leave these clamps loose for now so that the new plenum can be installed and adjusted.


Transfer the Stud from the Original Plenum
Remove the stud closest to the larger breather connection from the original plenum. Transfer this stud to the new Eventuri plenum using a 15mm socket or wrench.

Install the New Eventuri Plenum
Lower the new plenum into position. Start the plenum into the silicone hose couplers, but do not fully seat it yet. Install the smaller hose connection to the underside of the plenum.

Fully Seat the Plenum
Once the underside hose is connected, fully seat the plenum into the silicone couplers. Install the 10mm nut onto the transferred stud, reconnect the larger breather hose, and tighten the hose clamps on the plenum side of the couplers.

Position the Transmission Dipstick
Position the transmission dipstick into the new mounting location and secure it once the bracket is properly aligned.
Install the Plenum Inlet Coupler
Install the coupler onto the inlet side of the plenum. Confirm that the coupler is installed in the correct orientation before tightening.
Transfer the MAF Sensor
Remove the MAF sensor from the original intake assembly and transfer it to the new Eventuri plenum and intake assembly. Do not reuse the original MAF hardware. Use the included T25 Torx machined hardware instead.

Install Hose Clamps on the Plenum Inlet
Install the hose clamps onto the plenum inlet coupler as shown. Leave the clamps slightly loose until the air filter housing is positioned correctly.
Remove the Original Airbox Insulator
Remove the original airbox insulator from the chassis. This will expose the mounting stud used for the new air filter housing.
Install the New Air Filter Housing
Install the new Eventuri air filter housing into position. Using the exposed stud from the previous step, secure the air filter housing with the supplied 10mm nut.
Tighten the Intake Hose Clamp
Confirm that the inlet coupler and air filter housing are fully seated, then tighten the hose clamp.

SMG Fluid Reservoir Relocation (SMG-Equipped E46 M3 Only)
If you have an SMG, disconnect the SMG fluid hose from the tank on the plenum. The hose disengages from the reservoir by pushing the black circular clip upwards. Be careful to stop the fluid from leaking out when removing the hose. For SMG owners, install the SMG fluid reservoir relocation tank onto the strut tower with the SMG bracket and new line attached.


Reinstall the Headlamp Module, Cover, and Connectors
Reinstall the headlamp module and tighten the 10mm nut and bolt securing the module. Then reinstall the plastic headlamp module cover and reconnect both headlamp connectors.
Reconnect the MAF Sensor
Reconnect the MAF sensor connector and make sure the connector clicks fully into place.

Install the New Valve Cover Breather Hose Assembly
Remove the breather hose from the valve cover, then install the new supplied hose assembly between the valve cover and plenum.

For later production build dates, the installation of the Valve Cover Breather Hose Assembly is different. Cut across the connecting tube as shown on both sides, then use the shorter vacuum hose supplied in the kit to join the connectors again.

Shown here is the breather assembly with the extended vacuum hose.

Remove the Air Shut-Off Valve
Locate the air shut-off valve in the scuttle area. Unclip the sensor plug, then remove the rubber hose from the rear connection as shown.
Modify the Original Hose Assembly
Using a utility knife, carefully slit the sides of the hose to remove the valve and solenoid from the plastic hose. Install the new supplied hose onto those ends.

Reconnect the Solenoid
Reconnect the solenoid to the vacuum hose it was removed from, then plug the solenoid electrical connector back in.
Reinstall the Hose into the Plenum
Reinstall the hose into the plenum and confirm that the hose is fully seated and routed correctly.
Reinstall the Hose Grommet and Weatherstrip
Install the grommet onto the hose, then reinstall the weatherstrip.

Reinstall the Pollen Filter Housing, Filter, and Cover
Reinstall the pollen filter housing and install the four T30 Torx screws, tightening them to factory specification. Place the pollen filter back into the housing. Reinstall the pollen filter cover and engage the retainers by turning each clip a quarter turn to lock.

Reinstall the Intake Inlet Housing
Reinstall the intake inlet housing and reinstall the four push-in retainers.

Reinstall the Strut Brace
Reinstall the strut brace, install the four 13mm nuts, and tighten securely.

Install the Carbon Brake Duct Scoop
Place the carbon scoop inside the brake duct. There is an opening inside which the metal collar needs to be pushed through.

Pull upwards from the inside of the engine bay by pulling the machined collar up while pushing the plastic duct down with your thumb. The collar will CLICK into place and should sit as shown here, with the plastic duct sitting in the groove at the bottom of the collar ALL THE WAY AROUND. DO NOT put force on the carbon.

The plastic duct MUST sit in this groove all the way around. Pull the metal collar up from all sides to make sure the scoop is securely in place.

Final Check Before Starting Your E46 M3
Before starting the vehicle, confirm the following:
- MAF sensor is connected
- Headlamp connectors are connected
- All breather hoses are fully seated
- All vacuum hoses are reconnected
- Throttle body couplers are fully seated
- All hose clamps are tight
- Throttle linkage has full clearance
- Transmission dipstick is secured
- Wiring harnesses are clipped back into position
- No tools or loose hardware remain in the engine bay
Start the vehicle and allow it to idle. Check for intake leaks, abnormal idle behavior, warning lights, or interference around the throttle linkage.
Why Choose the Eventuri E46 M3 Hybrid Carbon Airbox System?
The Eventuri Hybrid Carbon Airbox System is engineered to maximize airflow to the S54 engine in your BMW E46 M3, delivering improved throttle response, an aggressive intake sound, and a show-quality carbon fiber finish in the engine bay. With a properly installed Eventuri carbon plenum and intake, E46 M3 owners can expect noticeable performance gains, enhanced induction sound, and one of the most visually striking upgrades available for the chassis.
If you are looking for additional upgrades and accessories for your E46, browse our full collection of BMW E46 M3 performance parts and accessories.
If you have any questions about this Eventuri E46 M3 install or need assistance sourcing parts, contact our team for expert support on BMW M performance upgrades.


